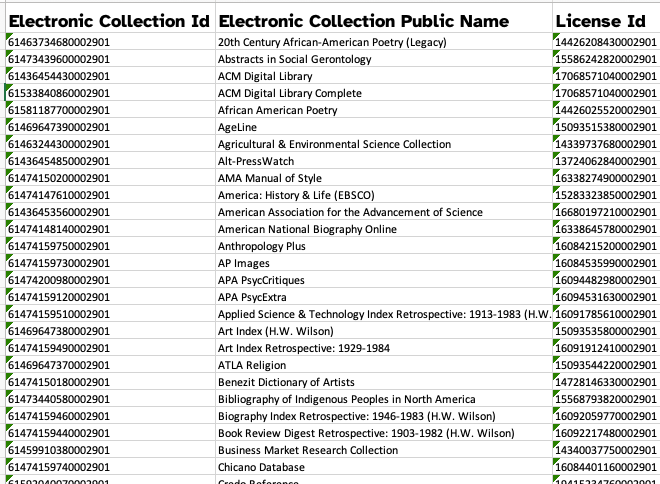
Exclude eBooks from CDI Results
Section 1: Background
This document examines the implications for enabling the feature “Exclude ebooks from CDI results.” Previously, as a Rapido customer, CSU could not take advantage of this feature but Rapido Basecamp has indicated that we may now do so.
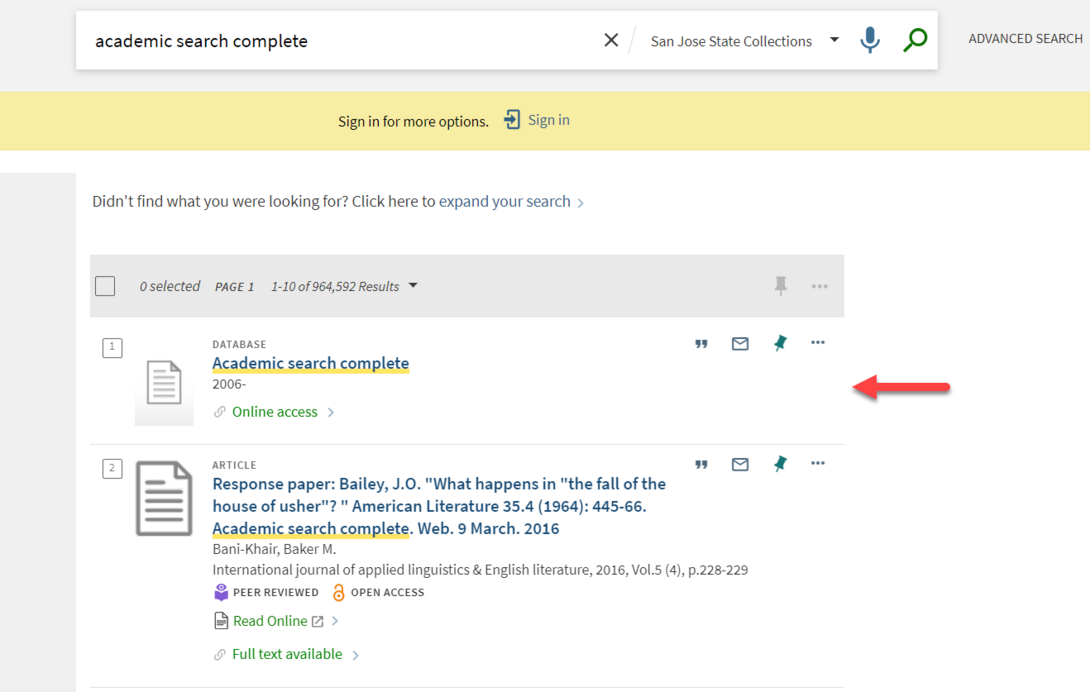
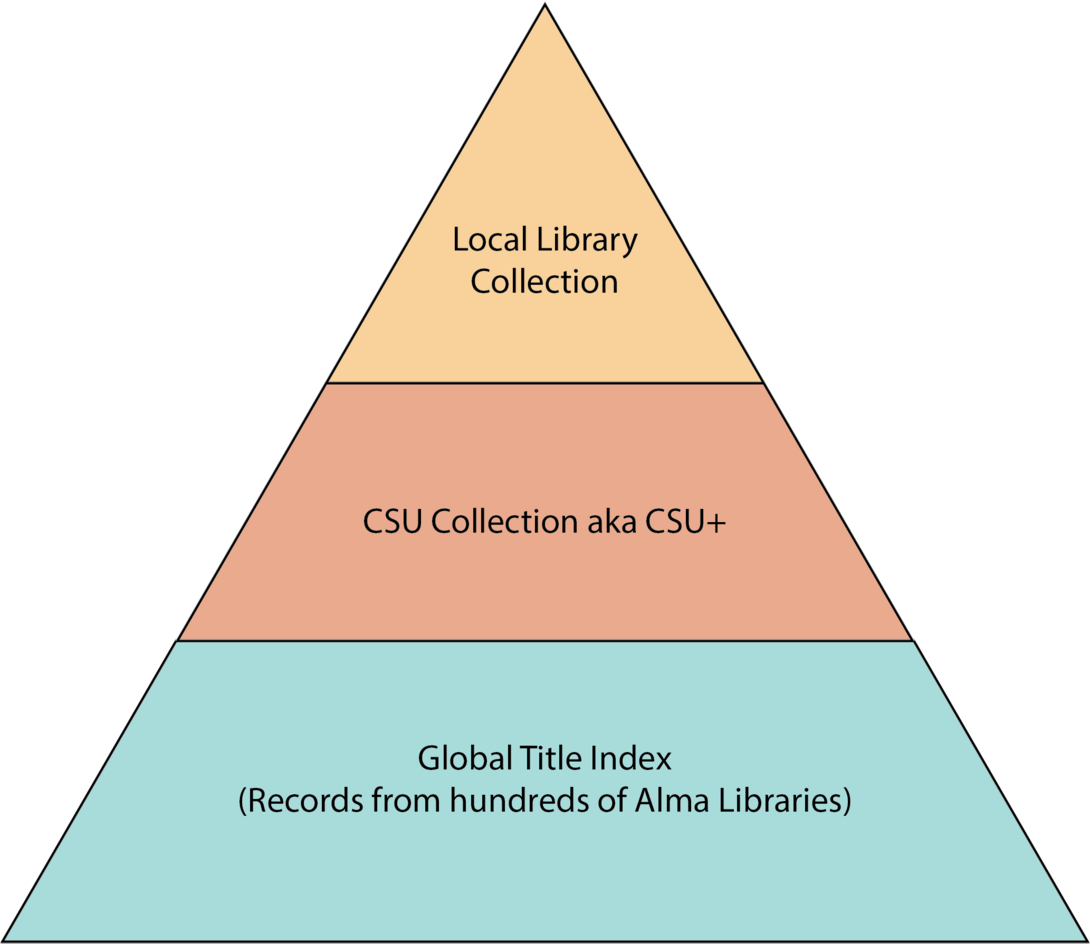
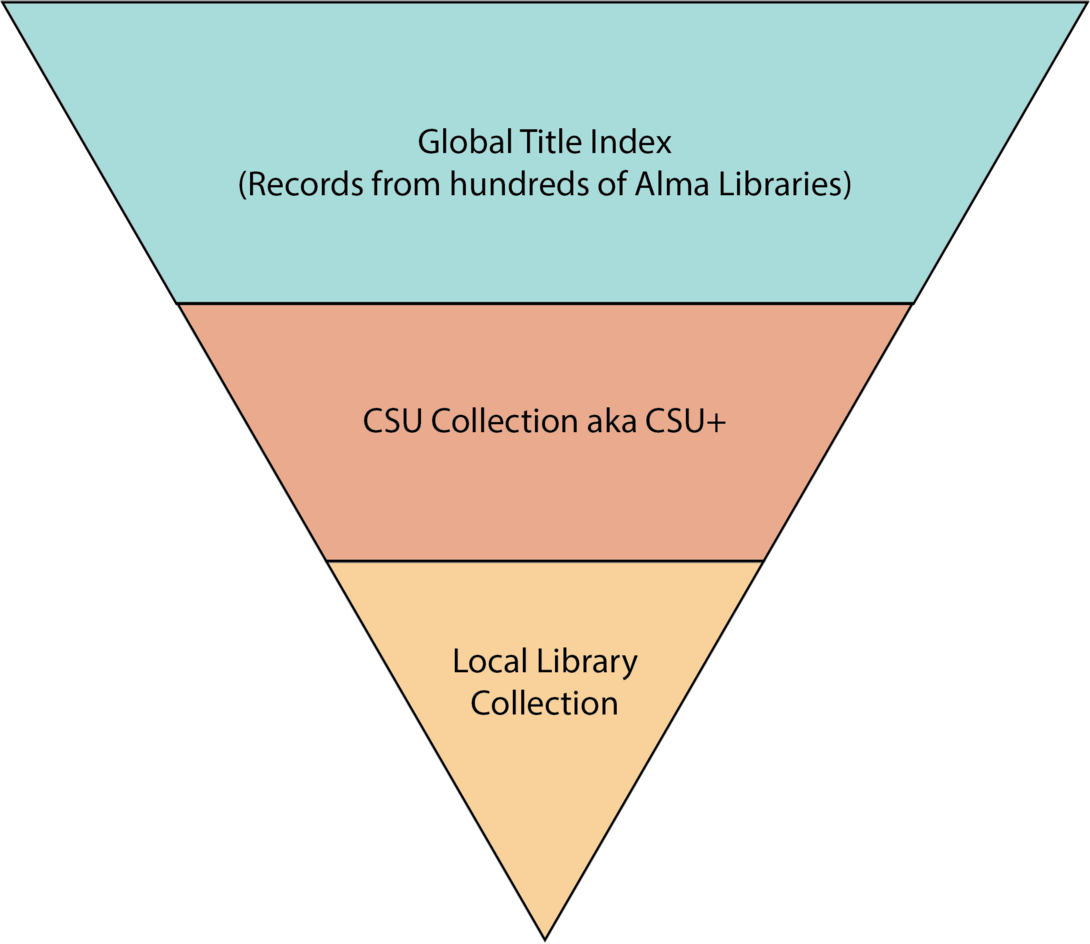
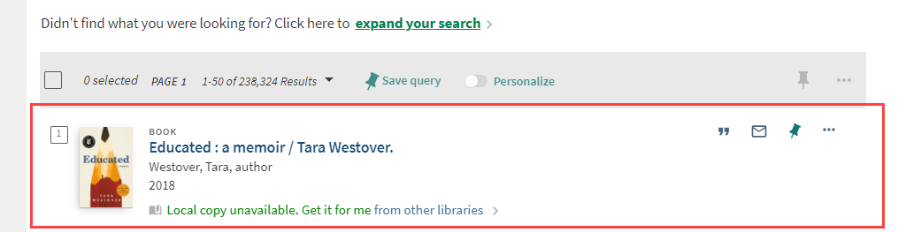
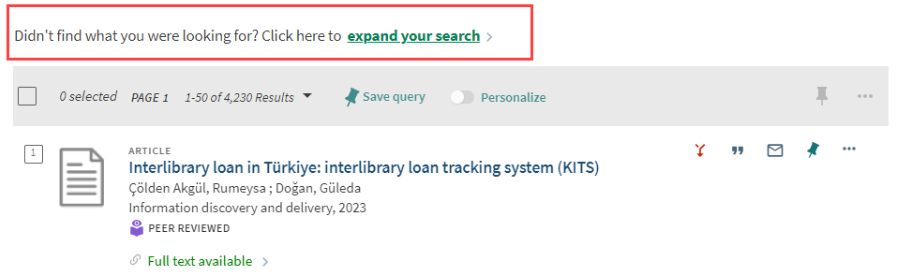
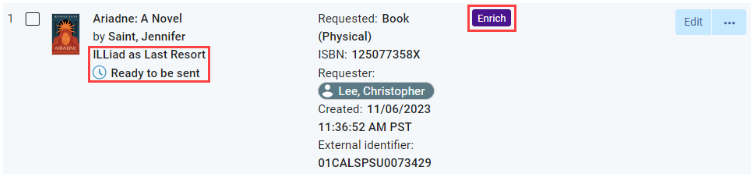
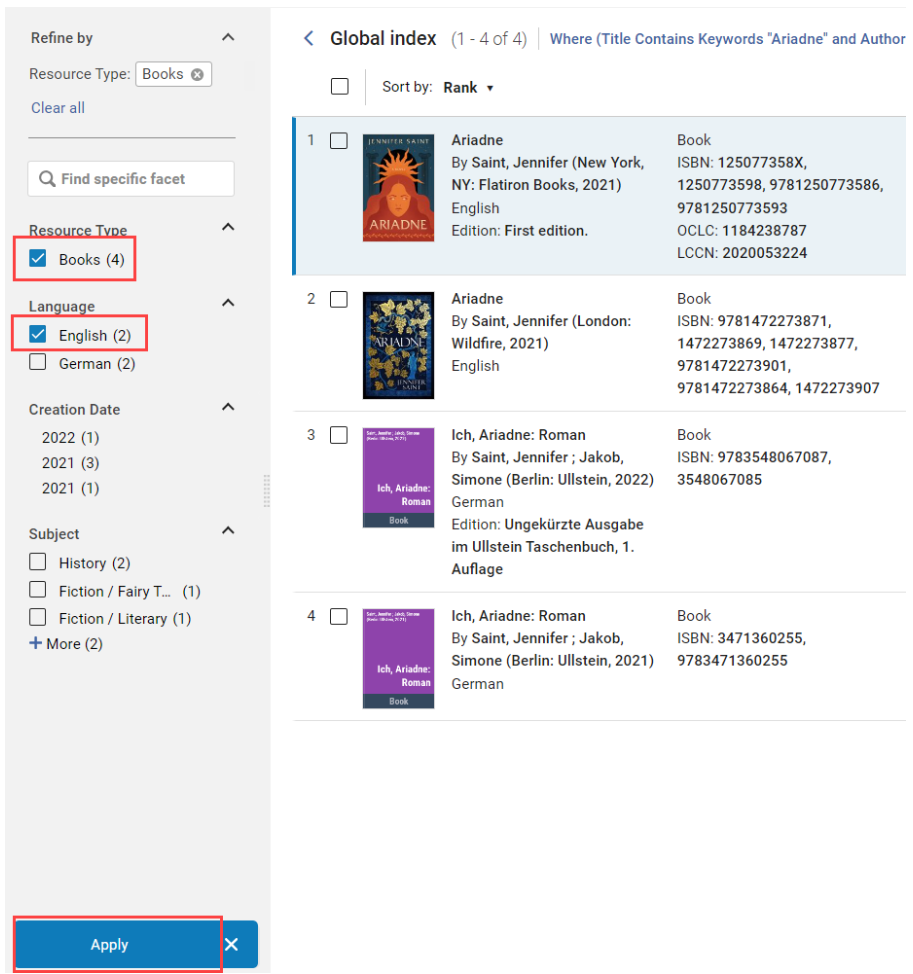
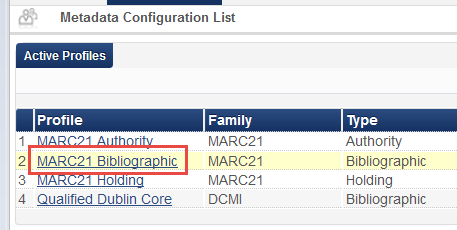
Currently, a search for an ebook title in Primo VE generally results in duplicate records – the Alma record, CDI records and Rapido GTI records.
How to identify these records:
Alma: https://csu-sjsu.primo.exlibrisgroup.com/permalink/01CALS_SJO/90j6td/alma991014055596802919 This link will take you to an external website in a new tab.
CDI: https://csu-sjsu.primo.exlibrisgroup.com/permalink/01CALS_SJO/1nj5q0c/cdi_proquest_ebookcentral_EBC6964865 This link will take you to an external website in a new tab.
Rapido: https://csu-sjsu.primo.exlibrisgroup.com/permalink/01CALS_SJO/1vp5kuc/cdi_globaltitleindex_catalog_367259823 This link will take you to an external website in a new tab.
Activating this feature will remove many but not all of the CDI ebook records duplicates in filtered and expanded results. Keep in mind, some CDI records are better than Alma CZ bib records. Excluding the duplicates is optional but recommended because removal of duplicate records provides a less cluttered results list. However, it’s possible that some users have permalinks for CDI records that will no longer be available.
Section 2: Implementation
Steps to take before enabling the Exclude ebooks from CDI option:
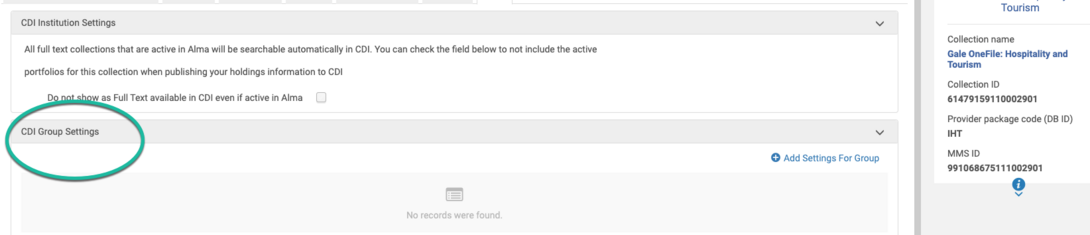
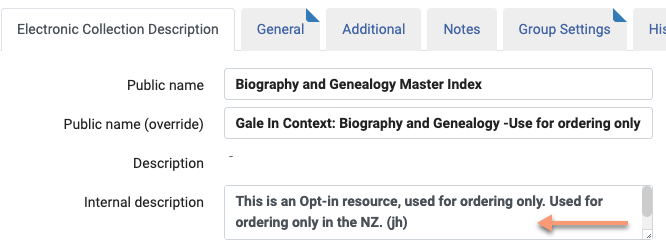
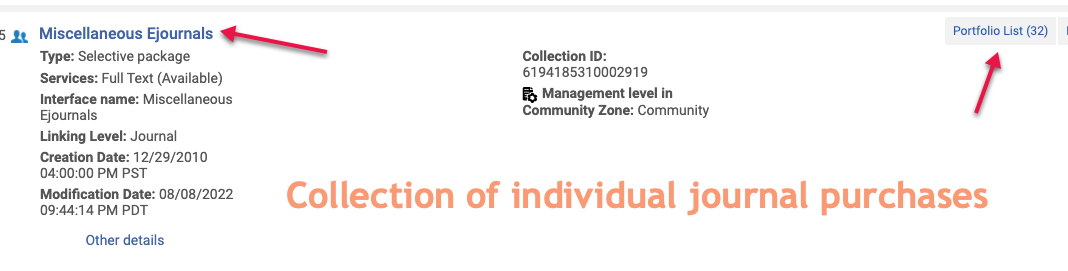
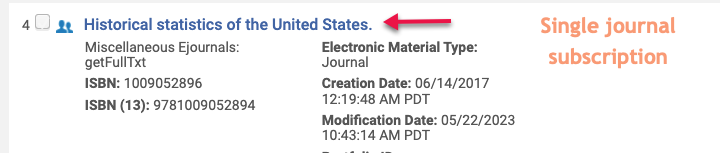
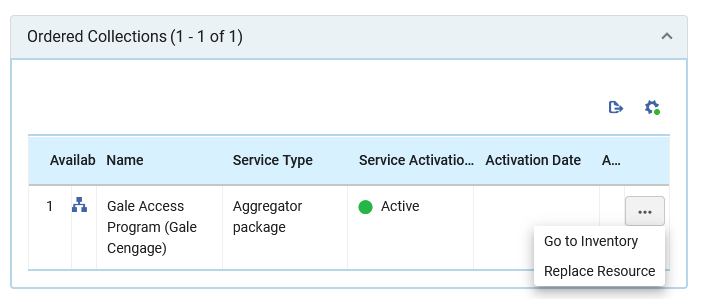
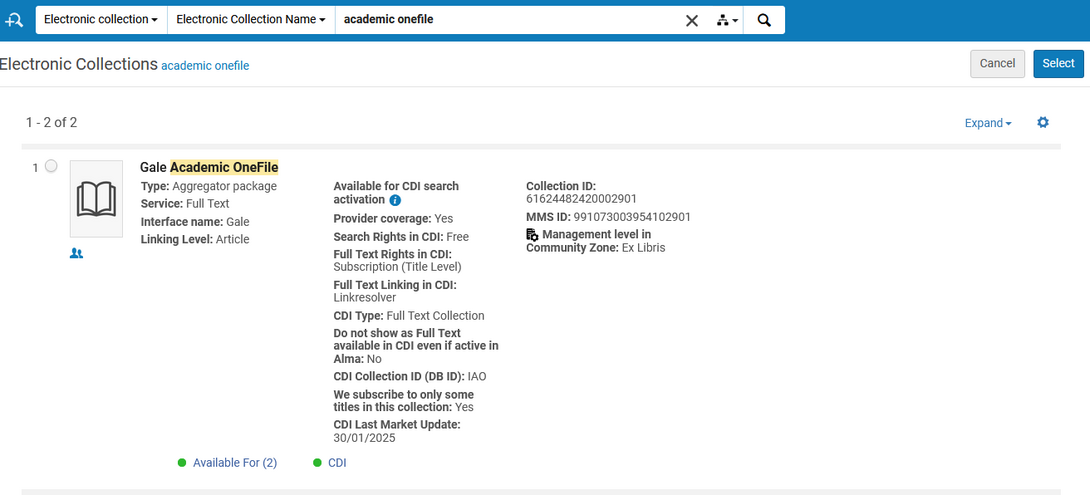
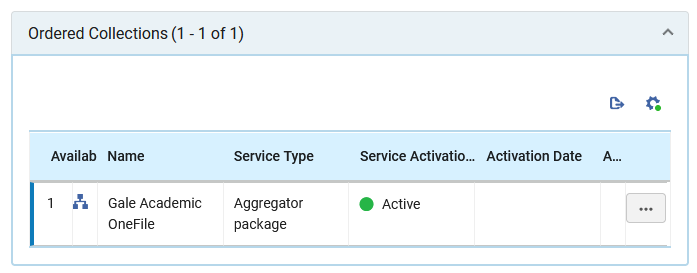
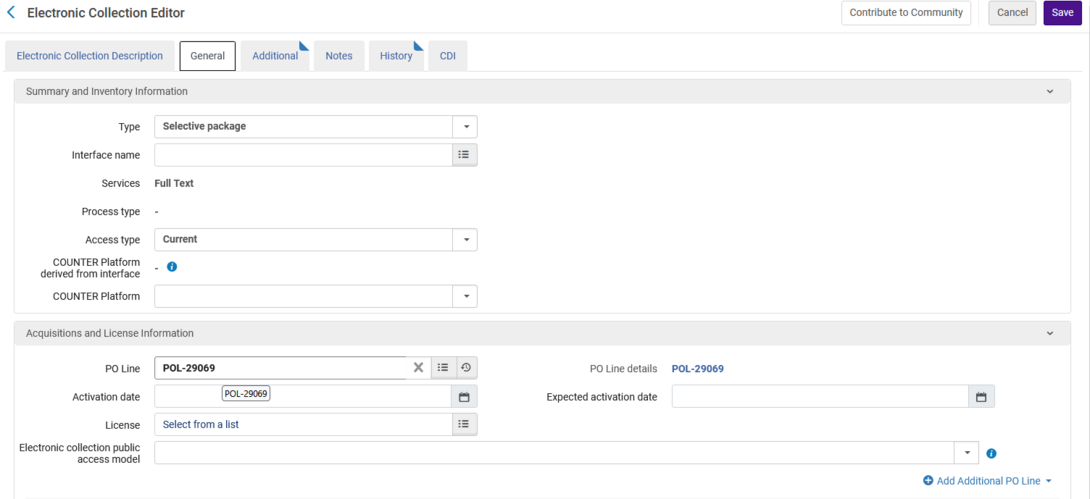
Review IZ ebook collections with portfolios.
These are the settings we usually recommend if not using the CDI exclude ebooks feature. Note: Once you activate the Exclude CDI ebooks box, Ex Libris says the settings do not matter here because the exclude ebook overwrites the collection level settings
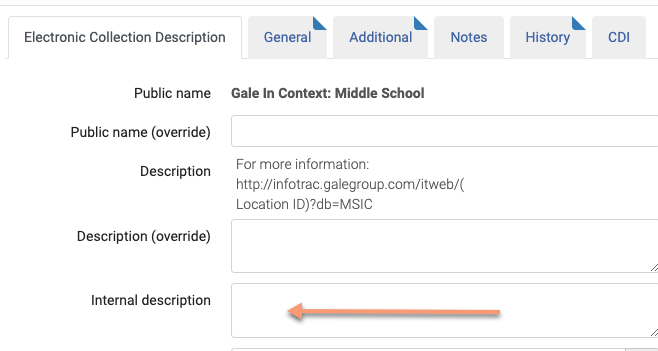
2. Review database only collections. (no Alma ebook portfolios)
These are the settings to use.
3. You may want to review your settings for NZ ebook collections.
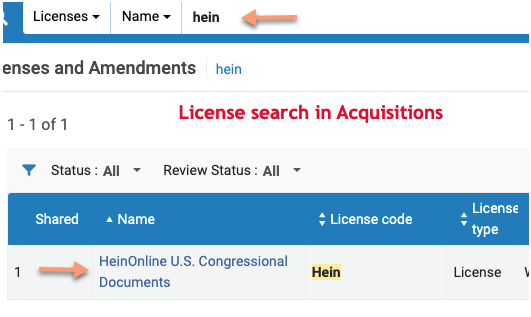
Use your NZ CDI login to access shared CDI collections to make updates.
Contact the eresourceshelp email if you need a log in.
4. Have a list of titles to test before implementation and after implementation from both IZ and NZ.
a. Make a note of permalink and screenshots prior to implementation for books and chapters in both filtered and expanded views for collections and databases.
b. After implementation, do duplicates disappear in filtered and expanded views?
c. Are book chapters appearing in filtered and expanded views?
d. If CDI duplicates remain, do you understand why? If not, open SF ticket.
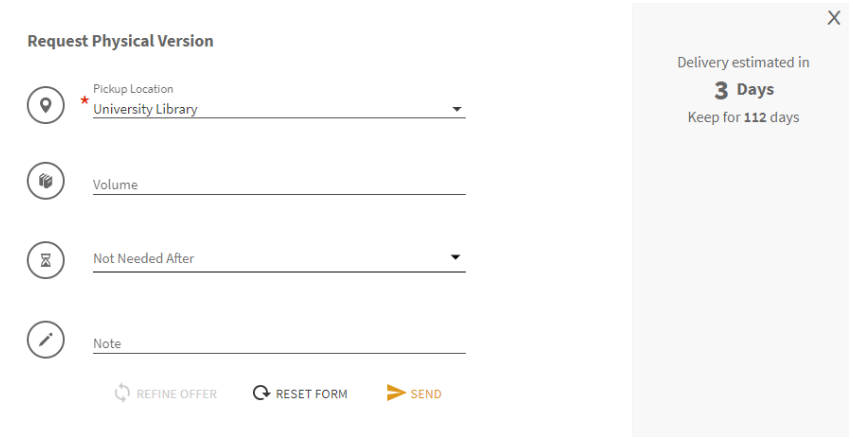
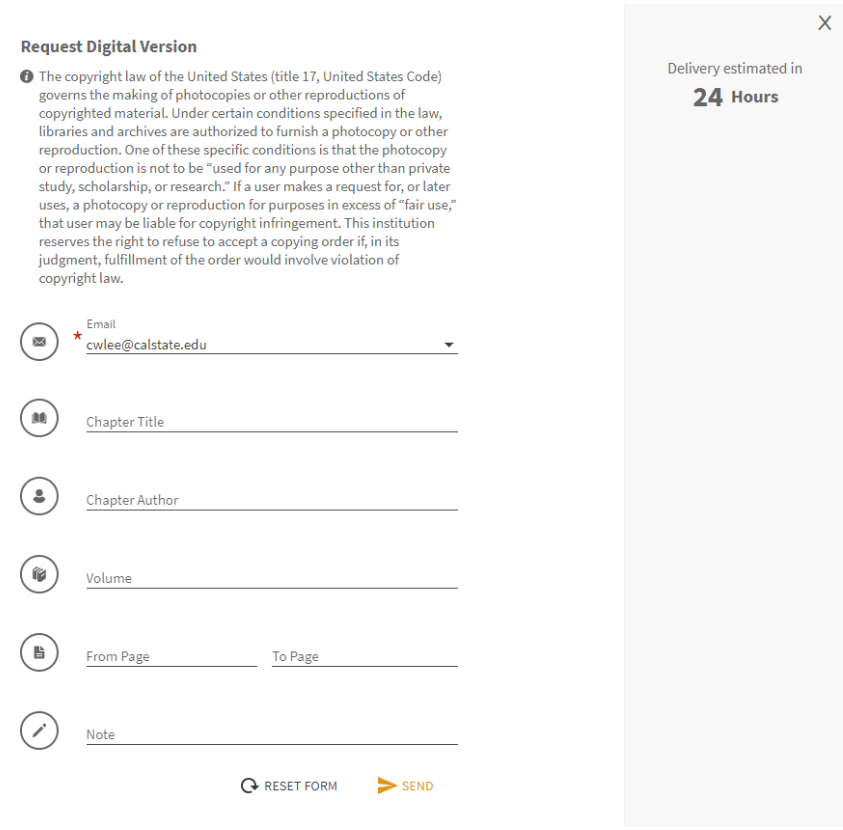
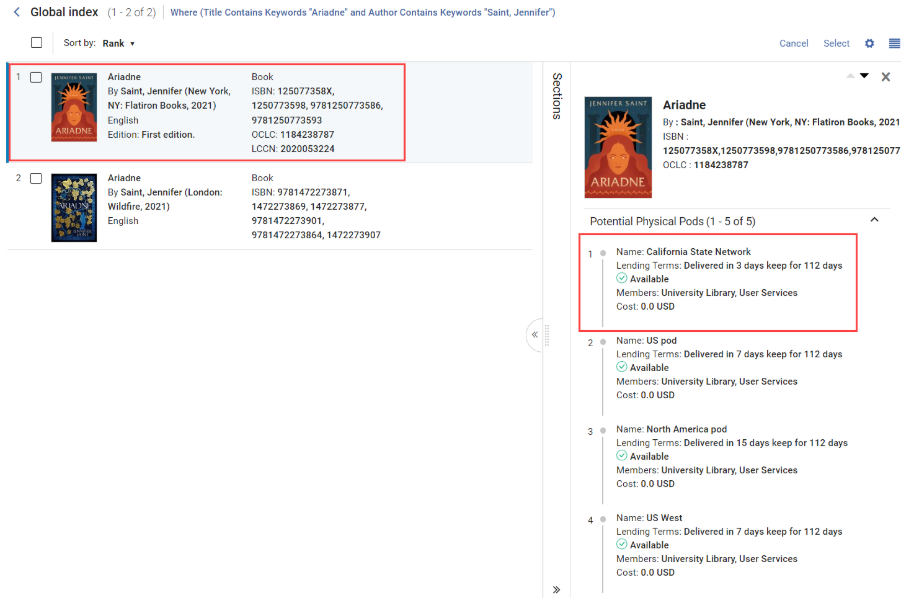
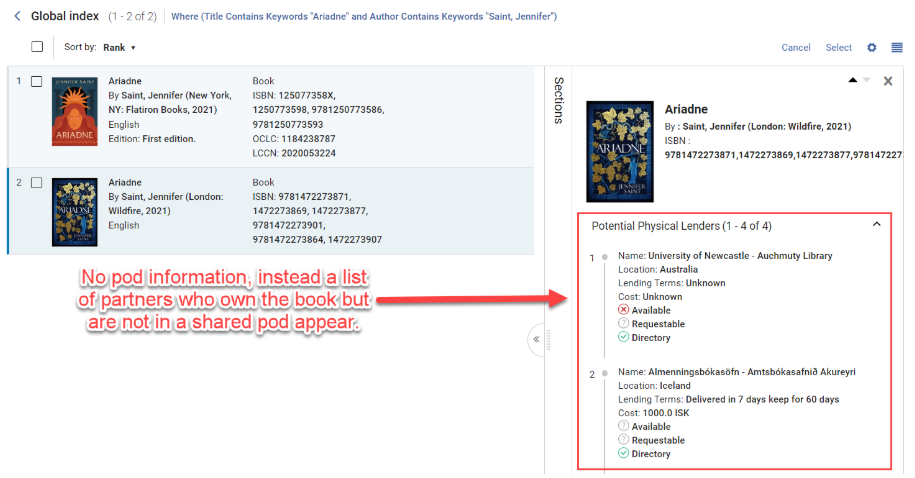
e. You will still see Rapido GTI records for collections with portfolios.
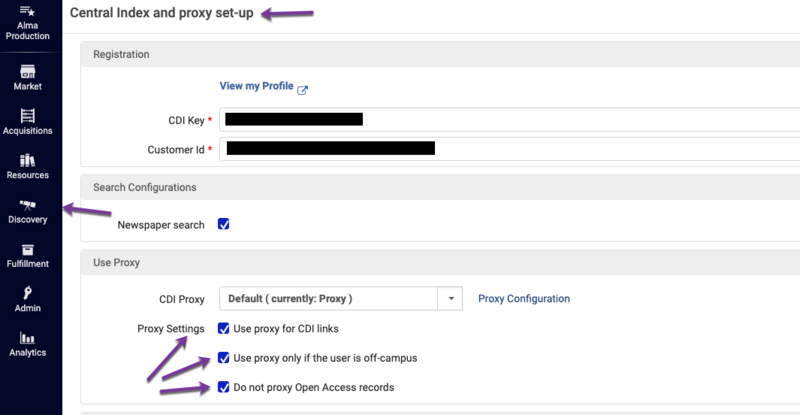
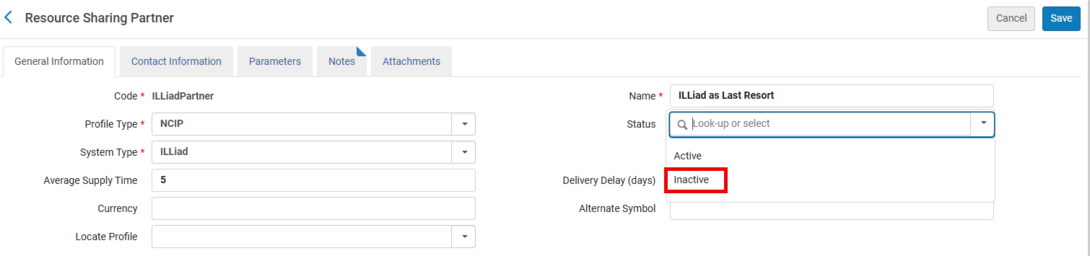
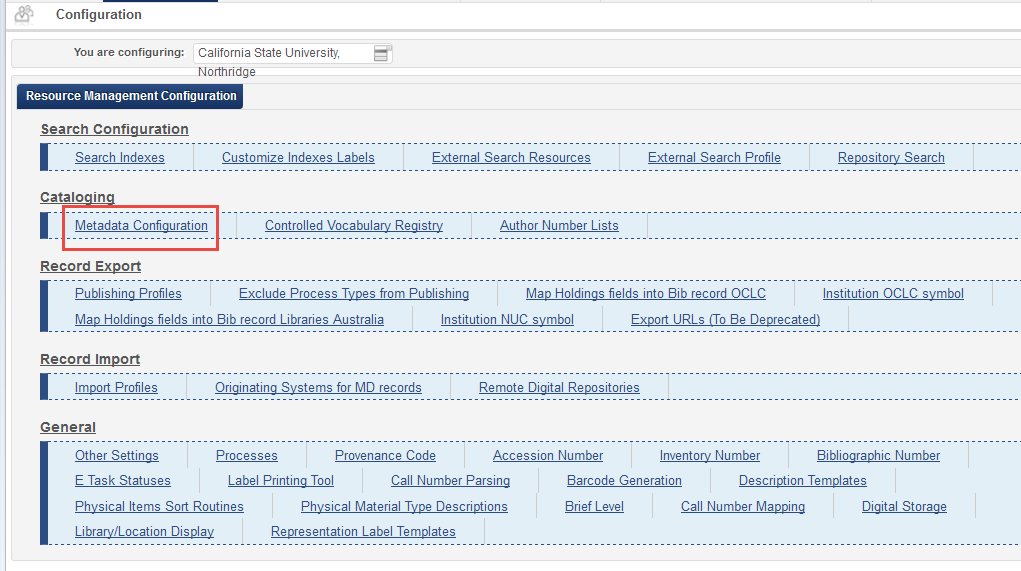
How to turn on the Exclude CDI eBooks setting (occurs in Discovery module):
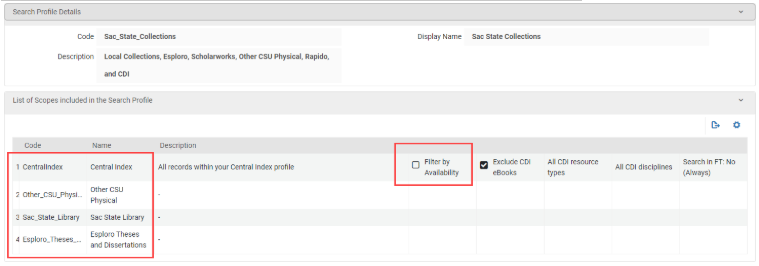
Configuration Menu > Discovery > Search Configuration > Search Profiles
To filter/exclude CDI eBooks for Primo VE customers:
Select the Exclude CDI eBooks option in each search profile that includes a CDI search scope (Central Index). For more information, see Configuring Search Profiles for Primo VE This link will take you to an external website in a new tab..
Note: Functionality takes effect immediately once the box for “Exclude ebooks for CDI is checked.”
Section 3: Ex Libris Documentation
Exclude eBooks from CDI Results:
November 2021 Phase 1: “This option is useful if you prefer to use your own eBook catalog records (in your Primo local index) instead of the eBook records from CDI. Turning on this option filters all eBook records from the CDI results, both in the filtered and expanded searches.”
Source: Primo VE release notes This link will take you to an external website in a new tab.
November 2022 Phase 2 update: “We exclude CDI eBook records only for collections that have portfolios in Alma instead of filtering out all eBook records from the CDI results. Books from database collections will continue to appear in the CDI search results. For example, if you have active collections for Wiley or JSTOR books, these books are not returned by CDI, but the books from HathiTrust or other collections without portfolios in Alma are returned.”
Source: Primo VE Release notes This link will take you to an external website in a new tab.
Ebooks in Discovery This link will take you to an external website in a new tab. documentation:
“Specifically for eBooks, CDI contains both eBook and chapter-level records. This leads to a situation where you have the same book records from both Alma in your local Primo index and CDI. As a result, users see duplicate records in their results list when using a blended search scope. Since it is not technically possible to deduplicate these records between the local Primo index and CDI, we are providing alternative options to suppress the duplications.”
EBook records from CDI appear in Primo search results if any of the following is true:
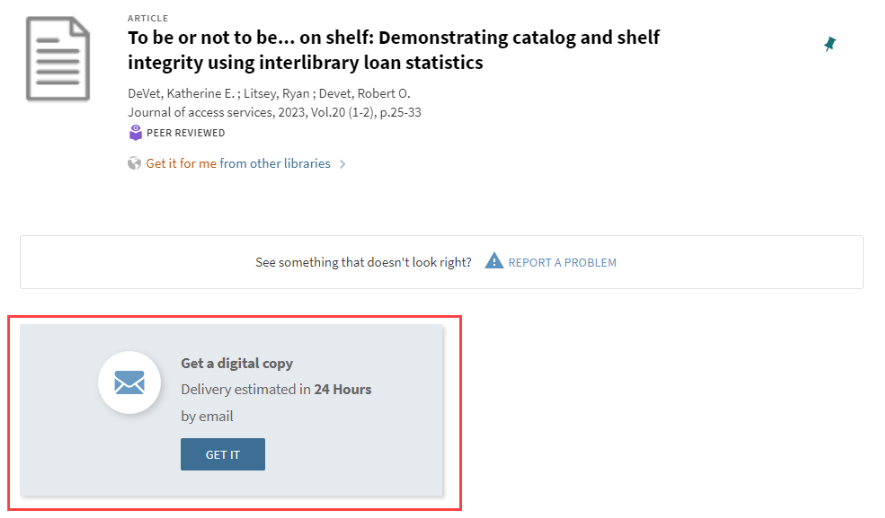
The eBook collection is active in Alma, has active portfolios (selective or aggregator package type e-collection), and is active for search (CDI search activation = Yes).Users will see duplicate records in their Primo search results (both filtered and expanded searches), or when searching blended search scopes: the Alma bib records from the active portfolios + CDI indexed records. Only CDI records that have corresponding portfolios in Alma will show the “Full-Text Available” label in this scenario. CDI eBook records that don’t match to any Alma portfolios will not appear in filtered search, but will appear in expanded search and show the “No full-text” label.
The eBook collection is a Database type e-collection (no portfolios), is active for search (CDI search activation = Yes), and the “ Full-Text Available in CDI Only” option is checked. In this scenario, all CDI eBook records will appear in both filtered AND expanded search with the “Full-Text Available” label.
The eBook collection (whether database/selective or aggregator package) is NOT active in Alma, but is active for search (CDI search activation = Yes). Unless there is an active portfolio in any of your Alma collections, these records display the No full text available status and appear only when the expanded search option is enabled.
To prevent this, you can use either of the following options:
Option 1 - Suppress CDI eBooks/full-text availability labels of CDI eBooks – ERM does not recommend (aka the “Do not show as Full Text available in CDI even if active in Alma option in the CDI tab).
When this option is enabled, CDI eBook records for this collection do not appear in your filtered search scope in Primo They are, for al intents and purposes, “suppressed” from discovery in Primo.
However, if the same collection has its “CDI search activation” option set to “Yes” the CDI eBook records for the collection will still appear in the expanded search (expand beyond the library collection), but will display the No full text available status.
Enabling the “Do not show as Full Text available in CDI even if active in Alma” option in combination with setting “CDI search activation” to “Yes” is NOT recommended because it will result in false negatives in your expanded search scope: CDI eBook records displaying “No-full text.”
The same applies to the chapter level records, which would not appear in the filtered result list, but would appear in the expanded search scope with a “No full-text” label if the collection is set to “CDI active for Search = Yes”.
This option does not affect your local bibliographic records. They are published to the local Primo index and are discoverable as before in Primo.
Note: In cases where the same content is available and active in several collections in Alma but is only suppressed for CDI in one collection, the content is not suppressed, and the CDI records for those eBooks appear as available in CDI.
Option 2 –Filter/Exclude CDI eBooks – ERM recommends this approach
When this option is enabled, records from CDI are filtered out in your blended search scope for collections with portfolios. You still get the book chapter records and the book records for collections that do not have portfolios in Alma (database type collections).
This configuration does not affect your local bibliographic records. They are still published to the local Primo index and are therefore discoverable as before in Primo.
In cases where you have a portfolio for an eBook in Alma and the same book is available from a collection without portfolios, you still see duplicates in your results list, but the duplication should be reduced.
If you are also using Rapido, you can use this option. Its effect is the same as described above for the filtered search, but when using the expanded search option, users may still see duplicates if a book is available from the global title index used by Rapido and from a collection without portfolios and/or as a local record.
Quote from Rapido Basecamp:
in filtered search, the results will include only local ebooks, and CDI ebooks from specific CDI collections (of type database). in the expand search, the results will include local ebooks, and CDI ebooks from specific CDI Collections (of type database), as well as CDI books that come from the Rapido global index
06639451 - Clarification for setting up Exclude eBooks from CDI Results - Phase 2 (NERS #6702)
(Responses in italics from Christine Stohn, Ex Libris Product Director, March 2023 responding to my request to address Support case.)
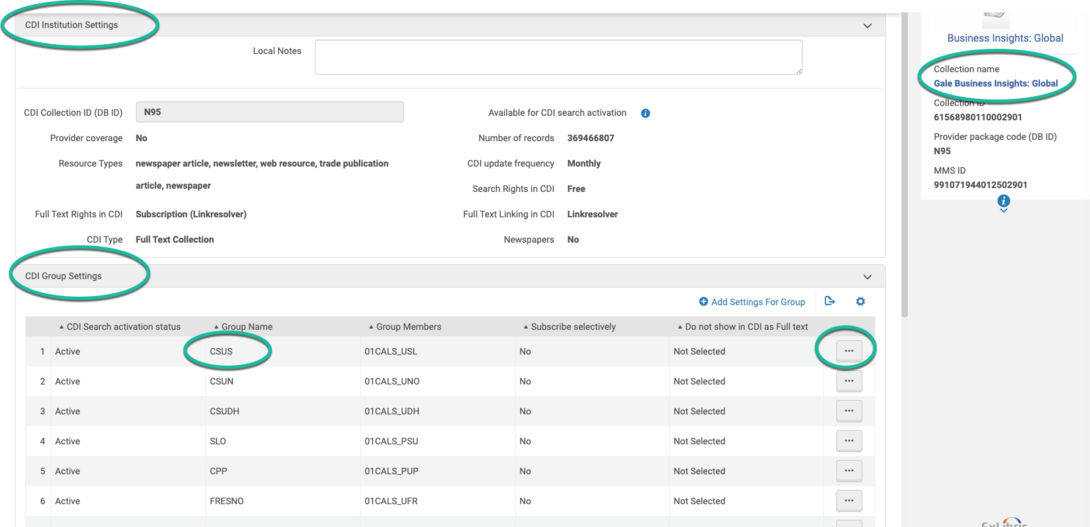
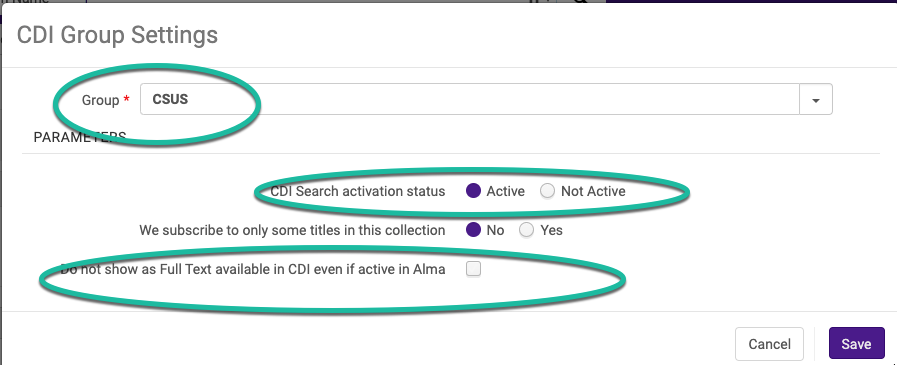
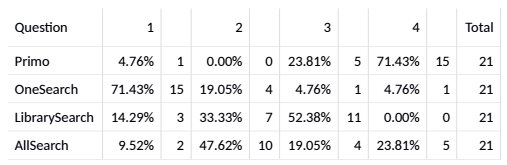
Question 1. For ebook collections with portfolios, are these the correct settings to exclude CDI records in filtered and expanded results:
CDI Search activation status -- Not active
We subscribe to only some titles in this collection -- yes
Do not show as Full Text available in CDI even if active in Alma -- leave unchecked
Yes, but the settings do not matter here because the exclude ebook overwrites the collection level settings
Question 2. For the above scenario, does the CDI search activation status matter?
No, it makes no difference
Question 3: For the Exclude ebooks from CDI results to work correctly, does every search profile that contains the Central Index profile need to have the Exclude CDI ebooks box checked? For example, what if I want to exclude the CDI ebooks from my filtered search but I'd like them to appear in my expanded search profile, can I not check the box in that particular profile? Or does this go back to my question about whether to activate CDI Search activation status?
Filtered and expand search are not typically defined as different search profiles so the setting applies to both together, you cannot set it separately. Generally it needs to be set for every search profile.
Question 4: For database type collections, are these the correct settings if we implement Exclude ebooks from CDI:
CDI Search activation status -- active
CDI-only full text activation -- checked
Do not show as Full Text available in CDI even if active in Alma – unchecked
When you say “correct”, do you mean for the ebooks to appear or not to appear? This is the correct setting for the ebooks to appear in the filtered search even with the exclude ebook setting on, if you use the CDI-only setting and do not want to activate the database in Alma. Ebooks from db type collections are not filtered by the central ebook filter setting. With the above collection level setting the books would appear.
An alternative to this setting is to use the Alma activation wizard for the database and activate it fully in Alma. In that case you do not need the CDI-only full text activation checked. So in this case your settings would be
CDI Search activation status – active
CDI-only full text activation -- unchecked
Do not show as Full Text available in CDI even if active in Alma – unchecked
The only difference would be that the bib record for the database in this case is published to Primo.
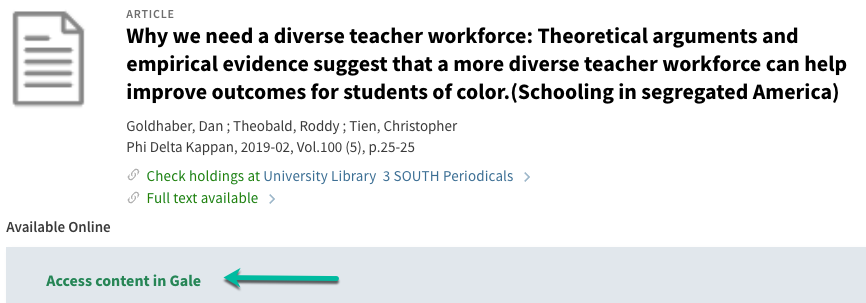
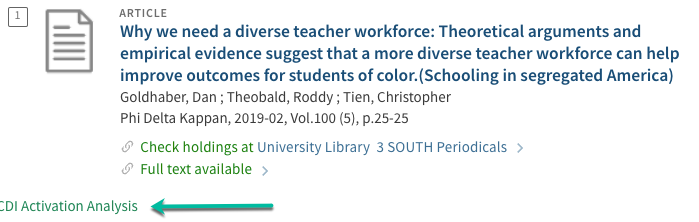
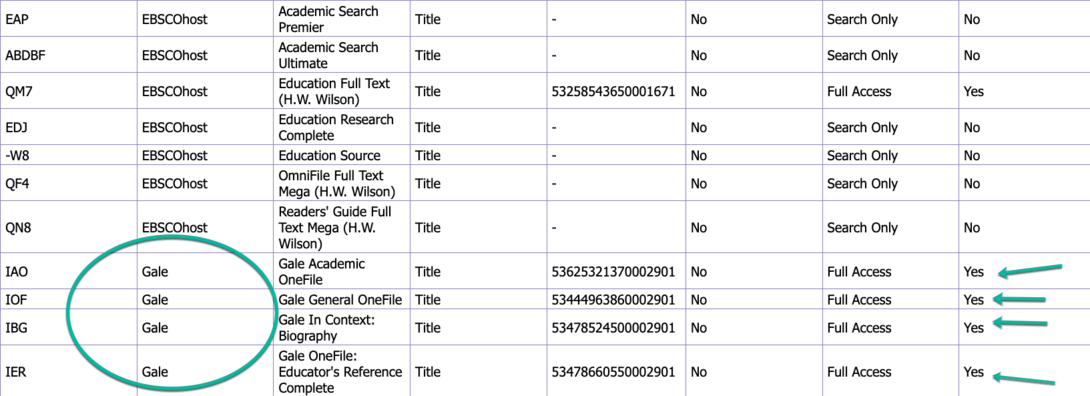
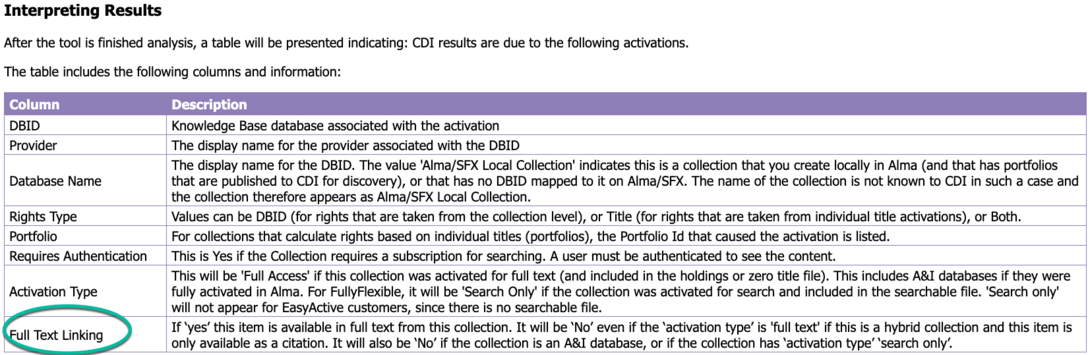
Question 5: Why am I still seeing CDI ebooks in filtered search? Is this because it's in a collection that I don't have active?
example: Why we need nuclear power : the environmental case
https://csu-sjsu.primo.exlibrisgroup.com/permalink/01CALS_SJO/1nj5q0c/cdi_askewsholts_vlebooks_9780199344598 This link will take you to an external website in a new tab.
As stated above we will need to conduct further analysis for this